
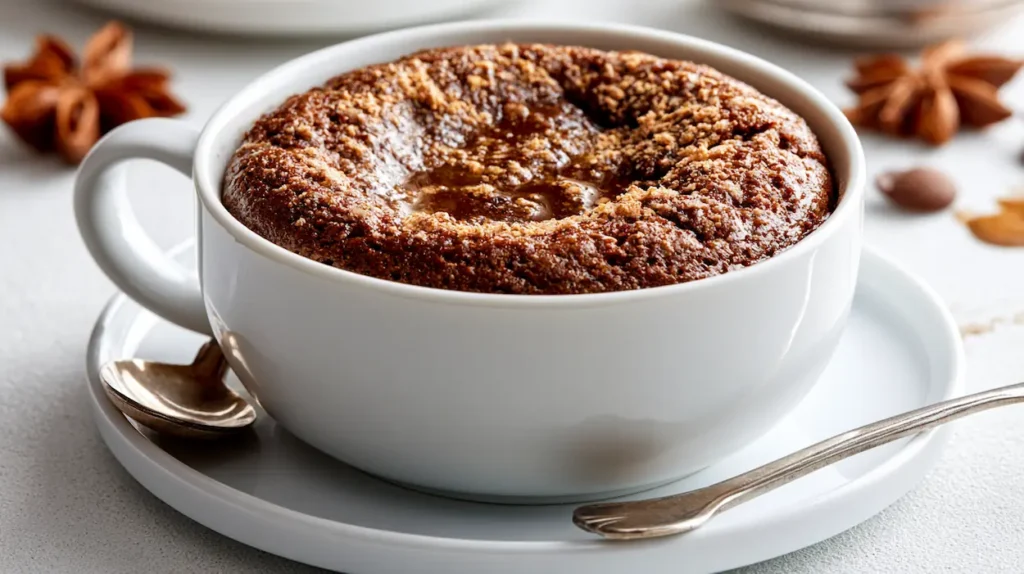
A mug cake usually turns rubbery for one of three reasons: too much flour, too much mixing, or too much time in the microwave. Because the portion is small, even one extra spoonful or 15 extra seconds can change the texture.
The safest approach is to measure lightly, stir only until the flour disappears, and stop cooking while the center still looks just slightly moist. It continues to set as the mug rests.
The real reason mug cakes turn rubbery
Mug cakes go rubbery for one main reason: overcooking. Microwaves cook fast and unevenly, so even thirty extra seconds can take a soft, tender cake and turn it into something chewy and dense. Unlike an oven, there’s no gentle ramp-up — it goes from underdone to overdone in what feels like a blink.
The other two culprits are too much flour and overmixing. Mug cake batters are small, which means tiny measuring mistakes have a big impact. A heavy-handed scoop of flour or stirring the batter like you’re trying to win an argument with it will both build up gluten and air bubbles that bake into a rubbery texture instead of a soft one.
How to fix it
- Undercook it slightly. Pull your mug out when the center still looks a little wet or glossy — it’ll finish setting from residual heat as it sits for a minute. This is the single biggest fix.
- Measure flour gently. Spoon it into the measuring cup and level it off instead of scooping straight from the bag, which packs in too much.
- Stir just until combined. A few lumps are fine. Overmixing is where a lot of mug cakes go wrong.
- Add a little fat or moisture. A spoonful of oil, melted butter, or even a splash of milk helps keep the crumb soft instead of tight.
- Use a wider, shallower mug. A tall narrow mug cooks unevenly — the edges overcook before the center is even close to done. A wider mug bakes more evenly all the way through.

What a good mug cake should look like
You’re aiming for something that looks almost underdone right when it comes out — soft, slightly shiny on top, and a little jiggly in the center. If you wait for it to look fully “set” the way a regular cake does, you’ve already gone too far. It’ll keep cooking in the mug for another minute after the microwave stops, so trust the process and pull it early.
This is actually the whole secret behind recipes like my Lemon Mug Cake — short cook time, soft center, no rubbery edges. Same goes for my Chocolate Mug Cake Without Eggs, which relies on getting the timing right since there’s no egg to help bind and structure things the usual way. And if you want something a little more indulgent, my Cinnamon Roll Mug Cake follows the same rules — slightly underbaked, soft in the middle, and never overmixed.
The bottom line
Use a wide microwave-safe mug, level the flour, and begin checking before the maximum cooking time. Microwave power varies, so the correct time for your kitchen may be shorter than the recipe states.
If the top is set and the center no longer looks like liquid batter, stop. Rest the cake for one minute and eat it warm; reheating a finished mug cake usually makes it tougher.
Use a two-stage microwave check
Microwave power varies widely, so a fixed cooking time is only a starting point. Cook the mug cake for 45 seconds, check the center, then continue in 10-second intervals. Stop when the surface looks set but still slightly moist. Residual heat will finish the center while the mug rests.
Measure flour without packing it
Too much flour is one of the fastest ways to create a dense or rubbery mug cake. Loosen the flour, spoon it into the measuring spoon, and level it gently. The batter should fall slowly from the spoon; if it looks like dough, mix in one teaspoon of milk before microwaving.
My Personal Rule for a Soft Mug Cake
I stop cooking as soon as the top looks set but still feels soft in the center. Every microwave is different, so I prefer adding a few seconds only when needed instead of risking a dry, rubbery cake.
Check Batter Texture Before the Mug Goes in the Microwave
The best time to prevent a rubbery mug cake is before cooking begins. After measuring the dry ingredients, loosen any compacted flour and level the spoon rather than scooping a mound. Put the wet ingredients in the mug as the recipe directs and stir from the bottom, where pockets of flour often hide. Stop once the visible dry streaks disappear. A few small lumps are less concerning than a batter that has been worked until it turns elastic. If the mixture is so stiff that it sits in a single dense ball, compare your measurements with the recipe before adding anything else; an extra spoonful of flour is easier to spot now than after microwaving.
The batter should be thick enough to rise as a cake but loose enough to spread slowly when you tilt the mug. If it resembles paste, a small amount of the recipe’s milk may help, but add it in tiny increments and stop when the consistency changes. If it is runny like a drink, check whether a liquid was measured twice. Avoid rescuing a wet batter by dumping in flour without measuring, because that can swing the result back toward a dense cake. Make one small adjustment at a time and remember it for the next attempt.
Scrape the sides of the mug with a spoon so flour does not remain above the batter line. Wipe heavy smears from the upper rim before cooking; they can harden while the cake itself is still tender. If your recipe includes chocolate chips, fold them through with one or two turns instead of continuing to beat the entire batter. For an example with a different ingredient balance, see the chocolate mug cake without eggs; follow its own quantities rather than transferring a random amount of flour or milk into another recipe.
Match the Mug and Microwave to the Small Portion
A mug cake is a tiny batch, so the container changes how quickly the center cooks. In a wide mug, batter forms a shallow layer with more surface exposed to the microwave. In a narrow mug, the batter sits deeper and the middle may need more time even when the top looks cooked. Choose a microwave-safe mug with room for the cake to rise and make a note of its size if you plan to repeat the recipe. Reusing the same mug gives you a useful baseline; switching between a tall narrow cup and a broad bowl while keeping the timer unchanged makes comparisons harder.
Microwave settings also differ. A time that works for someone else’s appliance is a starting range, not a promise for yours. Begin below the longest stated time, pause to inspect the top, and add short bursts only if liquid batter remains. If the mug is very hot, handle it carefully and let the cake rest before taking a bite. The resting minute is part of the cooking process: heat already in the cake continues to firm the center after the microwave stops. Do not fill every second of that pause with more microwave time just because the surface is slightly shiny.
Keep a simple note of what worked: the mug you used, the power setting, the first interval, and any extra seconds. Two attempts with the same recipe can then teach you more than trying several recipes at random. The lemon mug cake and cinnamon roll mug cake have their own ingredients and textures, but the same short-interval approach can help you observe how your microwave handles a small cake. Adjust their individual directions based on the result you actually see.
Read the Finished Cake Before Changing the Recipe
A chewy center and a dry rim point to different problems. If the outside is tough while the middle was pleasant at first, the cake likely spent too long in the microwave or cooked unevenly in that mug. Shorten the final burst next time, or use a mug that gives the batter a more even depth. If the whole cake is dense from top to bottom, review the flour measurement and mixing rather than changing only the timer. A large amount of flour or a batter beaten for too long can produce a compact crumb even when you stop cooking at the right moment.
If the center is still genuinely liquid after resting, the cake needed a little more time. Return it to the microwave in a short interval, then rest and inspect again. There is a difference between a glossy, soft center and raw batter that flows when you tilt the mug. A spoon inserted near the middle can help you judge the texture, but do not expect a microwave cake to look exactly like an oven cake. The small portion sets quickly, and waiting for a completely dry surface is a common way to overshoot.
Take note of the first bite as well as the appearance. A cake that feels tender while warm but turns firm as it cools may have been close to its upper cooking limit. Eat it soon after its short rest, since reheating an already cooked mug cake often makes it firmer. If you want a dessert that is easier to make ahead and slice later, try a conventional bake such as lemon yogurt cake. A mug cake is most useful when you want one warm serving immediately, so evaluate it in that context.
Make One Change at a Time on Your Next Attempt
When a mug cake disappoints, it is tempting to change the flour, liquid, mug, and cooking time together. That makes it almost impossible to know which adjustment helped. Start by identifying the clearest symptom. For a dry, rubbery cake, keep the ingredients and mug the same but stop cooking a little earlier. For a heavy cake that never rises much, check the flour measurement and how long you stirred before changing the microwave. For a wet center with a firm edge, think about the mug’s shape and use brief final bursts instead of one long one.
Write down the revised time and the texture after the cake rests. If the result improves, keep that change and only then consider a second adjustment, such as using a slightly wider mug. This is especially useful when comparing recipes: a chocolate batter, a lemon batter, and a cinnamon batter may not need identical cook times even in the same appliance. Follow each recipe’s measurements first, then calibrate the last few seconds to your microwave. The point is to learn a repeatable method, not to force every batter into one universal timer setting.
For serving, add a topping after cooking rather than trying to fix the batter with a large amount of extra sugar or flour. A spoonful of yogurt, berries, or a little sauce can complement a tender cake. It will not fully reverse an overcooked one, so treat toppings as a finishing choice rather than a substitute for good timing. Once you know the mug, measuring method, and stopping point that work in your kitchen, a soft single-serving cake becomes far more predictable.
Frequently Asked Questions About Rubbery Mug Cakes
Why did my mug cake become chewy after cooling?
It was probably cooked slightly too long. Microwave cakes lose moisture quickly, so remove the mug as soon as the center is just set and eat it while warm.
Can I remake a dry mug cake?
You cannot fully reverse overcooking, but a spoonful of yogurt, fruit, or warm sauce can improve the texture. For the next cake, reduce the cooking time by 10 to 20 seconds.
Does the size of the mug change the result?
Yes. A wide mug spreads the batter into a thinner layer that cooks faster, while a narrow mug keeps the center deeper and may need a little more time. Use a microwave-safe mug that is large enough for the batter to rise without spilling, and make timing adjustments in short intervals.